Vinyl is one of the most practical siding materials. It’s inexpensive, easy to install, and requires little upkeep. If you’re a DIY-er at heart looking for a simple vinyl siding installation technique, then this guide is for you.
Check out Heritage Exteriors for more expert advice on siding, roofing, and other vital exterior structures.
Preparation for Vinyl Siding Installation
Before rolling up your sleeves and getting to work, there are two preliminary steps you should complete.
The first is to gather all the necessary supplies so you can finish the job effectively and without interruptions. The second is to learn the basics of vinyl siding installation to avoid making the common mistakes associated with it.
Materials and Tools Needed
Here’s a list of all the materials and tools you’ll need to carry out this siding task:
Materials
- Sheathing
- J-channel lengths
- Vinyl siding (as needed)
- Wide starter strips
- Corner posts
Tools
- Zip tool
- Drill
- Reciprocating saw
- Ladder
- Galvanized shingle nails
- Hammer
- Measuring tape
- Utility knife
- Chalk line
- Line level
- Snap lock punch
Important Information to Know
We’ll share with you the three fundamentals of installing vinyl siding:
- Allow Space Between Panels
When the temperature changes, vinyl varies in composition. In hot weather, it expands, and in cold weather, it contracts. Naturally, this forces us to take specific precautions during installation so we don’t end up with buckled or warped siding.
One of the first measures we take is leaving a ¼-inch space between the panels. Here, we’re referring to panels placed above each other, not adjacent ones. We overlap adjacent panels, as you’ll see in a second.
- Coordinate Overlapping Panels
In most cases, adjoining vinyl panels should overlap. These interlocking sections create a sturdy shield against extreme weather conditions.
The standard overlap measurement ranges from 1 to 1 ¼ inches; however, always refer to the manufacturer’s instructions. Take care not to exceed the recommended measurements. If you do so, the siding will create an unsightly wavy appearance as it expands.
Now comes the real pro talk. Before installing the siding panels, plan the overlapping seam directions.
You see, nobody wants these overlapped seams to be visible on the front of their houses. That’s why we direct the overlapping toward the less trafficked sides of the house, which could be the left or right side.
- Don’t Overtighten Nails
When it’s time to fix a vinyl siding panel in place, remember not to overtighten the nails. That’s because if the nails are too tight, they won’t be forgiving when the material changes composition. They’ll damage the siding as it contracts and expands.
A good rule of thumb is to leave a 1⁄16-inch gap between the nail head and the siding.
How to Install Vinyl Siding: 9 Easy-To-Follow Steps

The process of installing vinyl siding consists of nine essential steps that are quite simple to follow. We’ll go over each one in detail below.
Step 1: Remove Old Siding
If you’re replacing your existing siding, you should know that you cannot install new vinyl siding over it. So, the first step is to grab a zip tool or whatever tool works best with the siding material you have and start the removal process.
When detaching old siding, make sure to remove any caulk or similar protrusions along the way. We want the exterior structure’s surface to be as smooth as possible. Believe us, that goes a long way toward achieving a seamless siding finish.
Step 2: Address Existing Structural Issues
Since siding materials completely cover the house, they tend to conceal structural issues. As a result, after getting rid of the old siding, thoroughly inspect the house’s exterior for any signs of trouble.
Two of the most common problems to look for are moisture damage and rot. You should also be on the lookout for signs of pest infestation. Keep in mind that failing to properly address these issues before installing new siding can threaten the structural integrity of your home.
Step 3: Pick the Right Sheathing Material
Adding sheathing lays the groundwork for vinyl installation. It creates a stable, flat surface to which you can easily nail the siding panels.
The sheathing is simply a material we use in construction where we install it on exterior walls to provide reinforcement. It can also serve a variety of other functions depending on the material you choose. Fiberboard sheathing, for example, has good insulation properties.
Take your time learning about the various sheathing types available to select the best one for your needs. We always recommend going with varieties that are moisture-resistant, like plywood.
Step 4: Add Sheathing
You can install the sheathing boards on the exterior either vertically or horizontally. Before securing them in place, make sure to leave about ⅛-inch space between each board to allow for expansion and contraction—as most sheathing materials do.
Start with nailing the frame of each board, leaving a 6-inch gap between each nail. Next, add a couple more parallel nailing lines inside this frame with a 12-inch space between each nail.
To cut the sheathing at windows, doors, and other openings, it’s preferable to do it from the inside of the house. While you’re standing in there, drill a ½ inch-wide hole in each corner of the opening. Then, remove the sheathing in this area by moving a reciprocating saw from one hole to the next.
Step 5: Install J-Channel for Soffit Siding
It’s usually best to start installing the siding at the soffit and fascia. We begin this process by fixing the lengths of the J-channel in place.
In case you didn’t know, a J-channel conceals the cut edges of vinyl, so it helps a lot in achieving a neat finish look. Not to mention how effective it is at keeping water from seeping through the siding ends.
At this step, you’ll need to install a J-channel along the inner edge of the fascia board. To do so, climb a ladder while carrying a hammer and a few nails in your tool belt.
While holding the channel against the edge, center a nail in one of the channel’s nailing slots, hammer it in, and then repeat in the next slots, leaving an 8 to 12-inch gap in between. Remember not to drive the nails too tight as you fix them in place.
Step 6: Nail Soffit Siding and Fascia Cover
You’ll find that most of the time, vinyl soffit panels come in 12-foot lengths, which means that you’ll have some cutting to do.
To determine the size of the required soffit siding piece, measure from the wall to the fascia board. Place this measurement on the panel, subtract ¼ to ½ inch for movement, mark the result, and start cutting using a utility knife or a vinyl siding blade if you have one.
Insert one end of each panel into the J-channel and nail the other end to the fascia board.
Once you’ve installed all the soffit pieces, attach the fascia board cover. Make sure to follow the manufacturer’s instructions in this part. However, typically, all that is required is to slide the top of the fascia cover behind the roof drip edge and nail the bottom part down.
Step 7: Attach Starter Strips and Corner Posts
Vinyl siding usually comes with starter strips that serve as the foundation for siding the walls. If you find them thin, we suggest getting the wider varieties, which are about 3 ½ inches wide.
What’s the purpose of starter strips? They ensure the horizontal siding panels are level and their edges are secured to prevent harsh weather elements from damaging the house structure.
You should install the starter strip at the lowest point of the sheathing. Once you’ve determined this point, nail a chalk line to one corner of the house, then go to the other corner and snap a line. Repeat the process until you have a level line all around the house; use a line level to ensure this.
After that, align the top of the starter strip with the chalk line and nail it in place, leaving a 10-inch gap between the nails. Then, install vinyl corner posts beginning ¾ inches below the bottom of the starter strips.
Step 8: Secure J-Channels Around Windows and Doors
To ensure that the wall siding isn’t exposed in any section, install J channels around the window and wall frames.
Before nailing a channel to each side of these structures, ensure to fit it tightly against their casing.
Step 9: Install Wall Siding
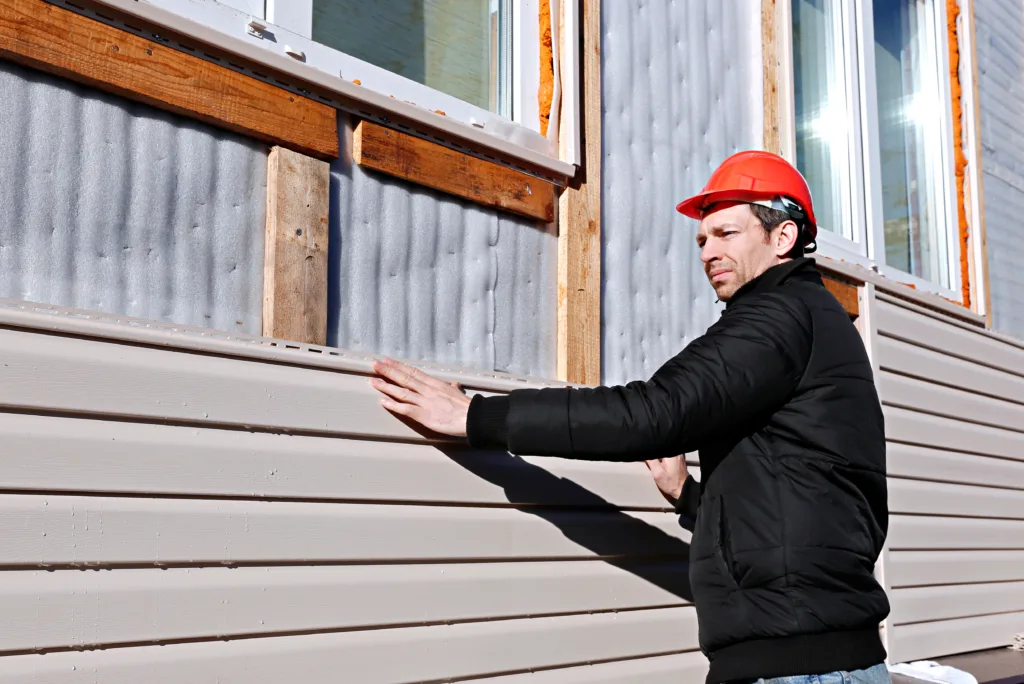
Although this step may require plenty of man-hours, it’s pretty straightforward to execute. You’ve now prepared the walls for siding installation, so all that remains is to cut and fit vinyl panels.
Start at the bottom of the wall and work your way up. Secure the bottom lip of the first line of vinyl panels behind the starter strips. Then, nail their upper side to the sheathing with a 16-inch gap between each nail.
When it’s time to install the top siding panel, you might need to cut its nailing slots to make it fit. That’s where the snap lock punch tool comes in; it’ll cut slots in the panel so you can easily nail it down.
Final Words
Once you learn the key points of handling vinyl siding, installation becomes much easier, and more importantly, the siding lasts longer.
Don’t forget to take all necessary safety precautions before carrying out this job and to have someone present with you in case something goes wrong.
Finally, if you feel that siding installation is more challenging than you thought, you can always contact us at Heritage Exteriors, and we’ll send over experts to handle it!