Many homeowners are interested in tackling new DIY projects, and roof installation is one of them. The thing is, knowing how to shingle a roof safely and effectively is critical. Otherwise, you risk injuring yourself or compromising the structural integrity of your home.
That’s why we’ve put together this detailed guide to help you understand everything you’ll need to do and have before and during the installation process.
Check out our roof installation services at Heritage Exteriors to see how we can assist you!
Choosing the Right Shingle Material
Selecting the best shingle material for your home is just as important as proper installation. To help you with that, we’ll take you on a quick tour of the most popular materials on the market, highlighting their benefits and drawbacks:
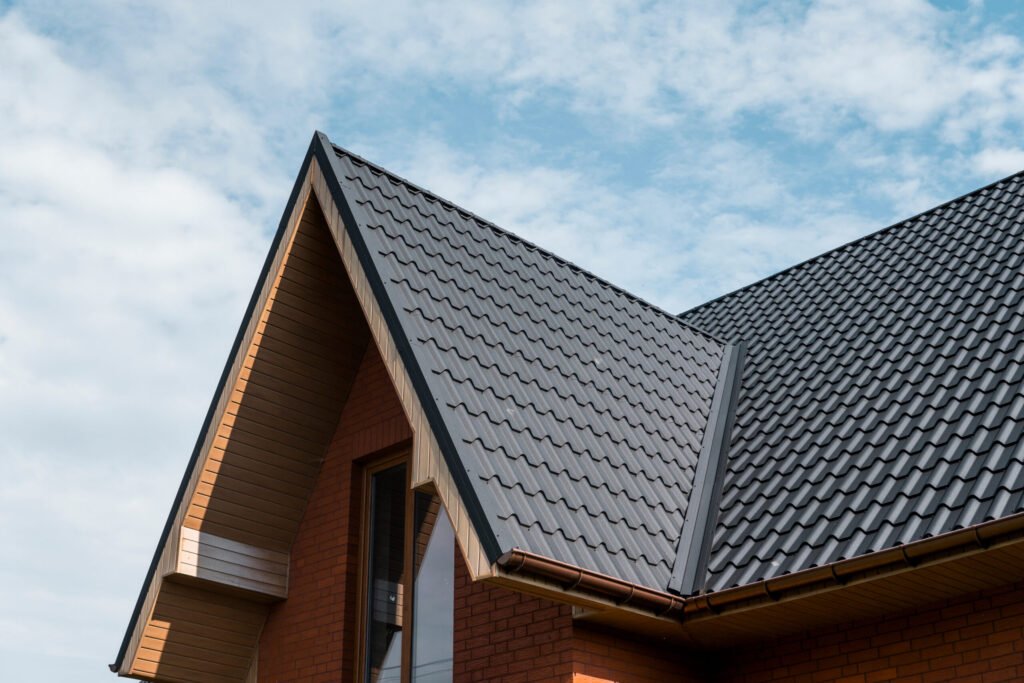
Composite Asphalt
Due to their numerous appealing properties, composite asphalt shingles are installed on approximately 90% of roofs in the US!
This material is reasonably priced, durable, and weather-resistant. It also has a simple installation process and requires little maintenance. And it’s lightweight, so you won’t need to reinforce the roof before installing it.
Composite asphalt shingles have a life expectancy of up to 30 years, which is relatively short compared to other shingle materials.
Wood
Known for their unrivaled rustic style, many homeowners love wood shingles! They come in various species, the most common of which is cedar because it’s naturally rot-resistant.
Although wood shingles have a nice curb appeal and provide excellent insulation, they don’t perform well in certain conditions. They’re prone to absorbing moisture and developing water damage, and they’re also flammable. But some shingles are now treated to reduce both risks.
This material is pricey and can last anywhere between 20 to 50 years, depending on the climate in your area.
Metal
Metal shingles not only add a modern touch, but they also come with extreme strength to withstand harsh weather! They’re energy-efficient as they do a perfect job at reflecting heat to keep your home cooler during the hot summer months.
These shingles have a lifespan of up to 75 years or more and age remarkably well! They are, however, expensive and require professional installation.
Clay
With their classic reddish-orange shade, clay shingles or tiles are among the most widely used materials, particularly in hot climate destinations. This material regulates the temperature inside by blocking the sun’s heat. It’s also fire-resistant and can endure high winds!
While clay shingles can last for as long as 100 years, they’re quite expensive to obtain, install, and repair. They’re also heavy, so you may need to add a support structure before setting them up.
Is It Difficult to Shingle a Roof?
You should be aware that any roof-related job carries potentially dangerous risks. Shingling a roof, in particular, can be a challenging task for beginners.
While it’s a shocking but eye-opening fact, the leading cause of death among construction workers is falling from ladders or similar structures, with 300-400 deaths recorded each year.
If you don’t have prior experience with roofing, it’s best to hire a professional to install the shingles.
How to Prepare for Shingle Installation
Before we jump into the shingle installation process, there are a few preparatory steps that you’ll need to take:
- Check Permits and Local Building Code
Roof replacement is considered a structural project, so it usually requires a permit to ensure compliance with state regulations.
You must carefully review your local building code so you don’t violate any regulations, or you’ll be fined. A building code is simply a set of written rules established by the city to manage structural aspects such as design and modifications within its jurisdiction.
- Read the Weather Forecast

Check the weather forecast before starting this project; while this may seem obvious, it’s frequently overlooked! You don’t want to be interrupted by rain mid-installation, as that’ll compromise both the roof’s performance and your safety.
Choose a clear day, preferably in the spring, after the sweltering summer days, and just before the leaves start falling heavily in autumn.
- Secure Outdoors and Indoors
Since there will be some heavy construction work going on the roof, there’s a risk of debris and other objects falling. Make sure to clear any vehicles from the driveway, bring outdoor furniture inside, cover your plants, and so on.
As you remove and install roof shingles, the walls of the house are likely to vibrate. That’s why you’ll need to secure items in your home close to walls, as they could fall and cause damage.
- Notify Your Neighbors
The process of installing roof shingles, or any part of the roof, is loud. From shoveling old shingles to hammering new ones to other various noises! This can be upsetting for your neighbors if they’re sensitive to noises or have pets that are irritated by them.
Inform your neighbors ahead of time about the dates you’ll be working on so they can plan accordingly if they are away during that period.
Calculating the Number of Shingles Required
To figure out how many shingles you’ll need, you’ll have to know two variables: the total square footage of your roof and the coverage provided by a single shingle. To obtain both, simply follow the easy steps we’ve outlined below:
- Measure Roof Dimensions: Measure the length and width of each section of the roof and multiply these measurements to determine the area of each section.
- Calculate the Total Roof Area: Add the areas of all the sections to obtain the total roof area.
- Get Total Square Footage: Divide the total roof area by 100 to get the total square footage of your roof.
- Identify Shingle Coverage: Check the manufacturer’s packaging to determine the shingle’s area coverage; they’re usually sold as three bundles per square foot.
- Estimate Number of Bundles: Multiply the total square footage by three to get an estimated number of shingle bundles needed for your roof.
On a related note, the total square footage measurement is how much-felt paper or underlayment you’ll need to purchase.
Remember that you’ll also need to account for waste. Sometimes you’ll need to cut shingles to fit around structures like vents, and other times there will be measurement errors, so it’s best to be prepared. A good rule of thumb is to add 10-15% to the estimated number of bundles.
Now, we’ll give you a numerical example to help you understand how the formula explained above is used. Assume you calculated the total area of your house’s roof, and it came out to be 3,000 feet; here’s what to do next:
- Total Square Footage = 3,000 ÷ 100 = 30 squares
- Number of Bundles = 30 x 3 = 90 bundles of shingles
- Accounting for Waste = 90 + (90 x 15%) = 103.5 total bundles of shingles
Safety Precautions
Working on a roof, as we previously explained, carries certain dangers. To reduce the possibility of potential risks when installing shingles, make sure you strictly adhere to the following safety precautions:
- Ensure you have all the necessary safety equipment, such as harnesses, a sturdy ladder, and non-slip footwear.
- Wear personal protective gear to protect yourself from sharp edges, debris, and dust you’ll be subjected to while working.
- Secure the ladder properly and ensure it’s on a level and stable surface, extending three feet above the roofline.
- Scan the roof for potential hazards, including exposed nails, electrical wires, or slick roofing material.
- Walk on sturdy sections of the roof and steer clear of fragile or damaged areas to avoid falls or roof damage.
- Keep the tools you’ll need to be organized in a tool belt to reduce distractions.
- Always work with a partner to ensure someone is available to help pass on materials or in case of an emergency.
Tools and Materials Needed to Shingle a Roof
It’s critical you have all the tools and materials needed for this project ready before beginning. That way, you won’t have to stop mid-task and waste time running back to the hardware store. Here’s a list of everything you’ll need:
Materials
The following are the roofing materials to look for:
- Roofing underlayment
- Drip edge flashing
- Flashing
- Starter shingles
- Roof shingles
- 1¼-inch roofing nails
- Ridge cap shingles
Tools
Here are the tools you’ll need to carry out this project:
- Ladder
- Roofing shovel
- Broom
- Trash cans
- Claw hammer
- Nail gun
- Tape measure
- Chalk line
- Utility knife
How to Shingle a Roof in 10 Steps
The method of installing shingles can vary depending on several factors, such as the type, design, and slope of the roof. We’ve compiled the general major steps of the installation process below, but you may need to modify them depending on your specific circumstances.
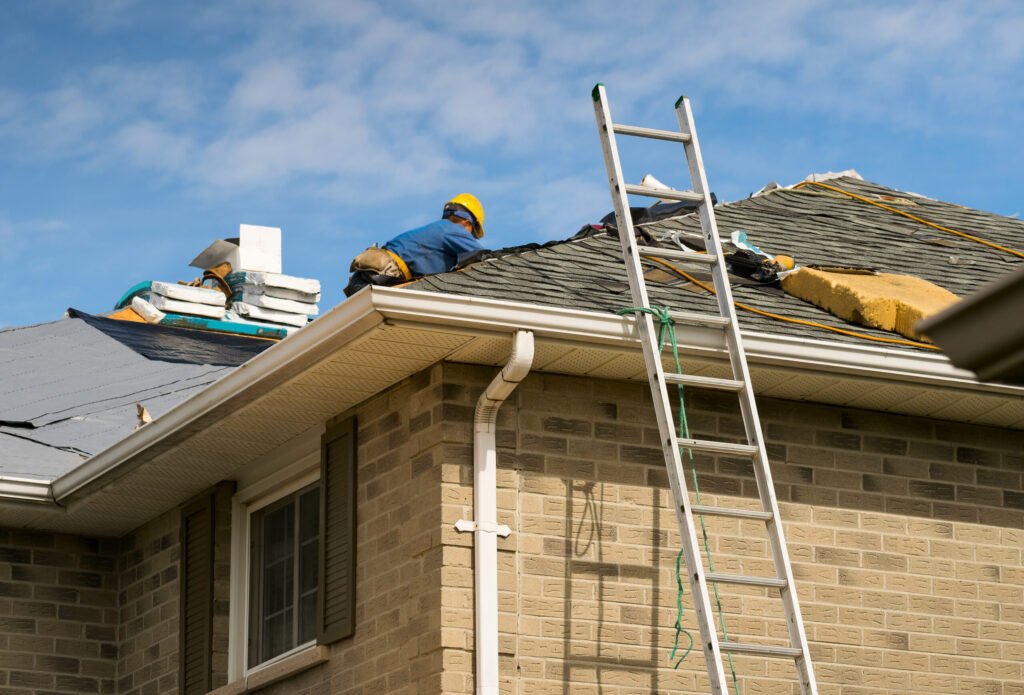
Step 1: Remove Old Roofing
Unless you’re working on a new roof, you’ll need to start by removing the old one. This includes materials such as existing shingles, underlayment, and flashing.
Climb up the ladder and begin by pulling off old shingles with the roof shovel. Then, using a claw hammer, remove the nails holding the underlayment, ridge caps, and metal flashing. If you’re lucky, you might be able to remove the flashing without causing any damage and use it later.
We recommend you work on sections of the roof separately to ensure that old materials are properly removed from the entire surface. You should also keep a trash can nearby and dispose of the waste from each section as soon as you finish it.
Step 2: Clean the Roof Thoroughly
To ensure proper installation of the new shingles, the roof deck must be smooth and free of debris. Grab a broom and start sweeping away any dirt or loose roofing particles. If there’s a lot of accumulated debris, you can use a power washer to clean it up.
It’d be best if you had a claw hammer on hand to remove any fasteners or nails you missed earlier. Be careful because exposed nails can easily damage the new roofing!
Step 3: Assess the Roof’s Condition
After you’ve cleaned the roof deck, it’ll be easier to examine its condition. Carefully inspect the roof for any signs of damage that could lead to future complications. These include rot, water leaks, and deterioration.
You must make all necessary repairs and reinforcements to the roof before beginning the installation. This will provide a solid foundation for the new shingles, allowing them to last for a long time.
Step 4: Set up the Underlayment
Spread the underlayment across the roof deck, making sure it’s straight. Most likely, you’ll find recommendations for overlapping in the manufacturer’s instructions. For example, you can find instructions to overlap successive rows by three inches for better water resistance.
Follow these measurements, then secure the underlayment in place with a nail gun or similar tool. Continue to straighten and tighten the membrane as you go to avoid wrinkles.
Roof underlayment is one of the roofing’s protective layers. It’s available in several types, the most common of which are asphalt-saturated felt, rubberized asphalt, and synthetics.
Although their effectiveness and properties differ, they all serve the same purpose: to act as a waterproof membrane. They’re installed between the roof deck and the shingles to prevent water from entering the house during heavy rain or snowfall.
Step 5: Fasten the Drip Edge
A drip edge is a metal flashing that runs around the perimeter of your roof. This roofing component is critical; in fact, without it, you’ll fail a home inspection when selling a house!
This flashing type directs water away from your roof’s edges or fascia. As a result, it keeps water from seeping in beneath your roofing and causing rot or structural damage.
To install the drip edge, lay it on the bottom edge of your roof and measure it about a half inch away from the fascia board. Then, secure it around the entire roof’s edges with a nail gun.
Step 6: Secure Flashing in Place
Several types of roof flashing are available, each with its own set of properties and applications. Step flashing, for example, is used against the walls of chimneys, while valley flashing is used when two different sloped parts of the roof meet to form a valley.
Learn about the various types of flashing and determine which one(s) you’ll need to install on your roof.
Step 7: Secure Starter Shingles
Starter shingles or strips are essential because they act as a barrier against water leaks and wind blow-offs at the roof’s eaves. They’re regarded as the first row of shingles.
Begin by measuring the length of your starter shingle. Take a measuring tape and a chalk line to the roof’s edge.
Measure the length of the roof shingle on the roof deck, slide it down by a quarter of an inch, and mark it horizontally with a chalk line. This is to ensure that the starter strip overhangs the drip edge. You might discover that you’ll need to shorten the starter shingles during this step.
Align the starter strip on the drawn line and secure it with nail heads placed 2-3 inches from the edge and spaced 10-12 inches apart.
Step 8: Create a Layout for New Shingles
You’ll draw a grid on the roof using your measuring tape and chalk line to guide you throughout the shingle installation process.
Shingles are usually divided into two parts: overlapping (the sections covered by other shingle rows) and visible (the parts showing on the roof).
You’ll need to obtain two measurements from the manufacturer’s label, which belong to the revealed part and the offsetting. Shingle offsets are simply the horizontal distances between the joints or gaps of adjacent shingle courses.
Assume the revealed portion is four inches long and the offset is six inches. Measure four inches horizontally above the starter shingles until you reach the roof’s top and six inches vertically. Snap a chalk line horizontally every 4-inch mark and vertically every 6-inch mark.
Step 9: Install Roof Shingles
Nail down the first shingle course straight on the starter strip. Then, you’ll need to cut the remaining shingle courses to follow the recommended offset. You can cut them all at once or as you go, whichever is more convenient for you.
Install the remaining shingles in their respective places on the grid until the entire roof is covered. Keep in mind that you’ll need to cut shingles laid around structures on your roof deck, such as vents or skylights, to fit snugly around them.
Step 10: Put the Ridge Cap Shingles
Finally, it’s time to put in the ridge shingles, which are made specifically for roof ridges. You’ll see that a ridge shingle is typically curved and thicker than regular ones. If they’re not pre-bent, you’ll need to curve them yourself when setting them up.
The method for laying these shingles varies depending on the manufacturer. However, they often should overlap the last course of shingles from both sides by at least five inches.
Final Word
Although shingling is one of the trickiest DIY projects, it’s also one of the most rewarding! Just make sure you choose the right material for your property, are well-prepared for the installation, and follow all safety precautions.
Contact one of our experienced roofing contractors at Heritage Exteriors for a hassle-free, effective roof installation!