Roof installation can be complicated. If done wrong, it can cause structural damage, flooding, roof falls, and serious injuries. So, you should fully grasp the installation process to protect the health and safety of your family.
But can you install the roof yourself, or do you need professional roofers? And how do you shingle a roof?
Luckily, we’re here to guide you through it, but that’s no substitute for professional help. Heritage Exteriors building contractors service cities like Willmar & Spicer, MN. If you need a solid roof over your head, consider getting our roofing installation services!
Do You Need Roof Installation?
If you’re thinking that it may be time for you to replace your roof, here are the questions that should help you know for sure.
How Old Is Your Roof?
Roof age is the main factor here. As a rule, asphalt roofs last about 20 years, whereas metal roofs last about 50 to 80 years. If your roof is nearing the end of its expected life, consider roof replacement.
Is Your Roof Sagging?
Sagging is a sure sign you need a new roof. It’s the result of rot in your roof and only gets worse with time, the roof potentially caving in.
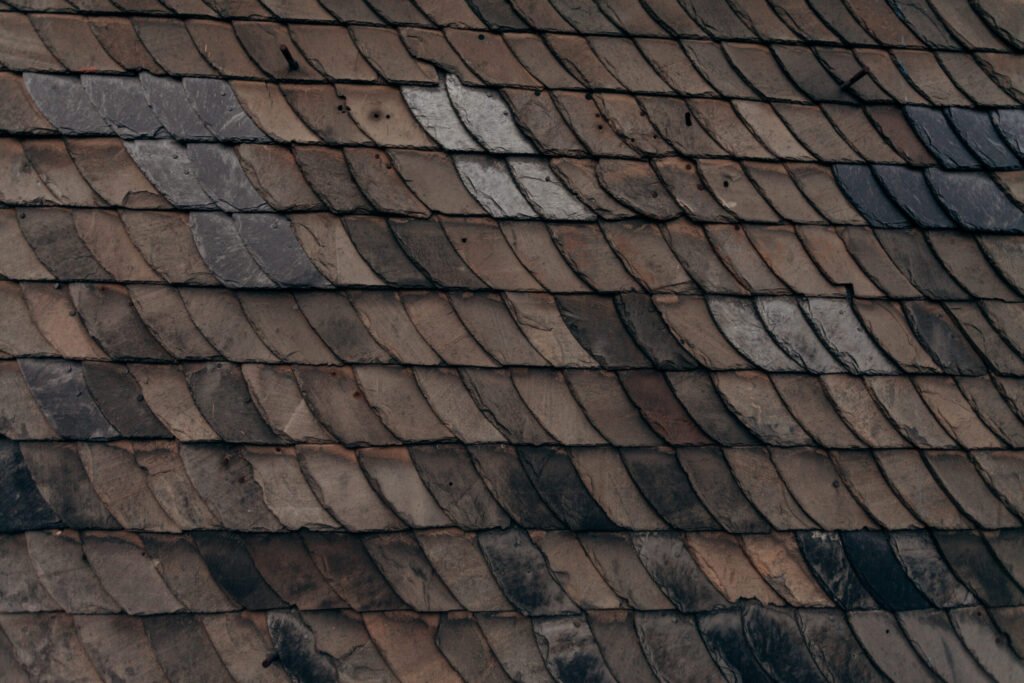
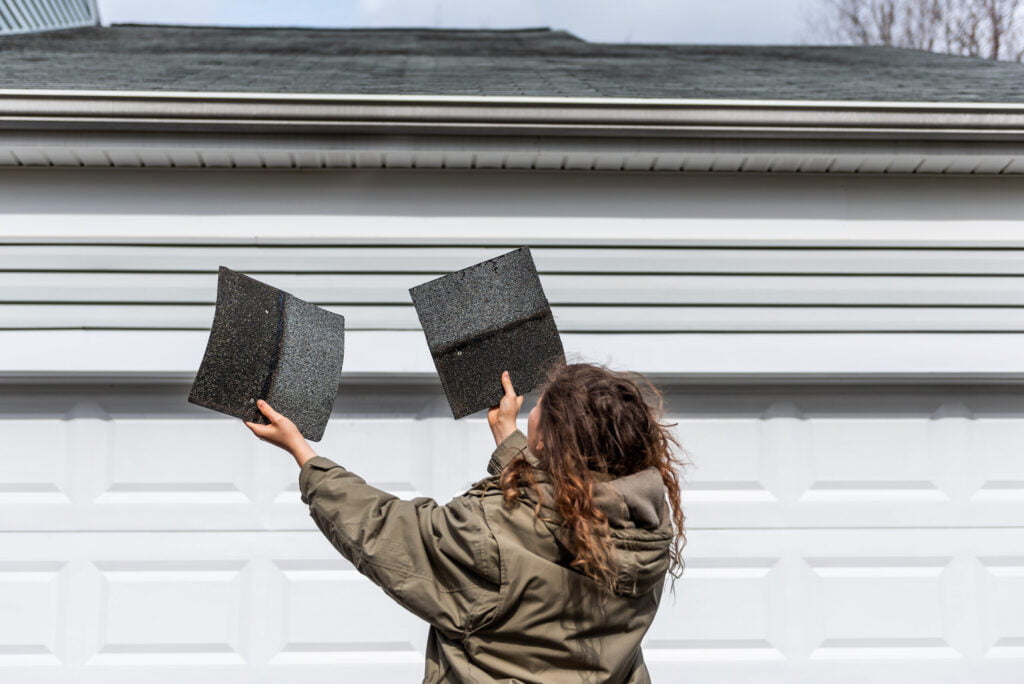
Do You See Damaged Shingles?
Damaged shingles might entice you to decide to replace your roof, whether it’s curling, cracking, or buckling due to the weather.
Do You See Leaks and Water Damage?
This time, you aren’t just checking the roof but also the attic. Look for wall and ceiling paint peeling, moisture stains, or damp rafters. These are signs of water damage, which can undermine the quality of your roof. Earlier signs of moisture damage include mold and moss. They’ll look like greenery on your shingles, typically growing on the dark areas of your roof.
Of course, not all damage requires a replacement; sometimes, a repair job will do. An expert will help direct you to the right choice.
DIY vs. Professional Roof Installation
There’s no doubt that getting experts to install your roof is the best way. It assures you of the quality of your roofing and protects you against roof accidents. Professional roofers will have licenses, ensuring that they can handle the safety risk and are protected.
For comparison, DIY installation is typically less expensive, as you get to save on labor costs (if you’re experienced). But you must be fit to handle the challenges of the job.
A good test is to climb onto your roof with a ladder. Can you walk around comfortably? Also, try hauling a bundle of shingles over your shoulder. Would you be able to carry them up a ladder? If not, it’s better to hire professional roofers.
And for beginners, it might be exceedingly difficult, time-consuming, and more costly. That’s because of the likelihood of improper installation, which results in high energy bills, potential leaks, and long-term structural damage. And you might also struggle to find correct, accurate instructions for installation online.
Types of Roof Installations
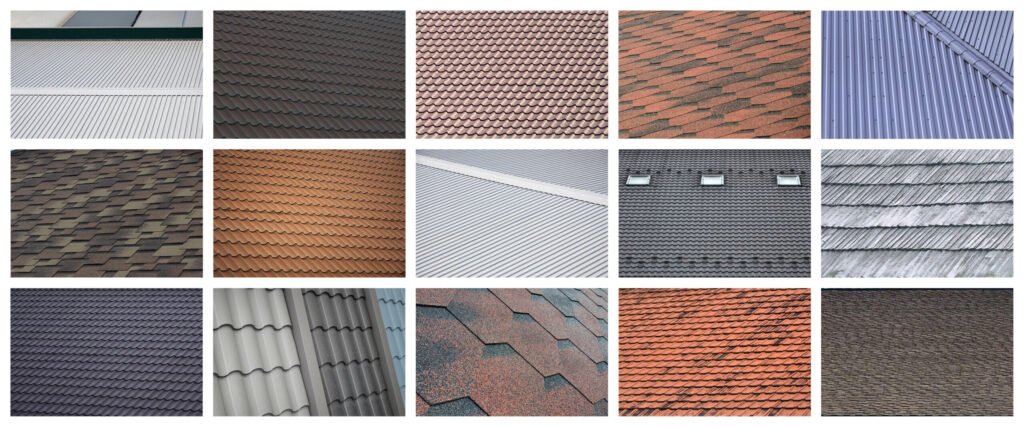
We can classify roof installations based on the type of roofing materials as follows:
Tile Roofing
These are manufactured using local materials; tiles tend to be cement, clay, concrete, or terracotta. They’re durable, visually appealing, environmentally friendly, and resistant to rotting. Tile roofing is too complex for most homeowners. You can repair a crack or a missing tile or replace a tile, but leave entire roof installations to the professionals.
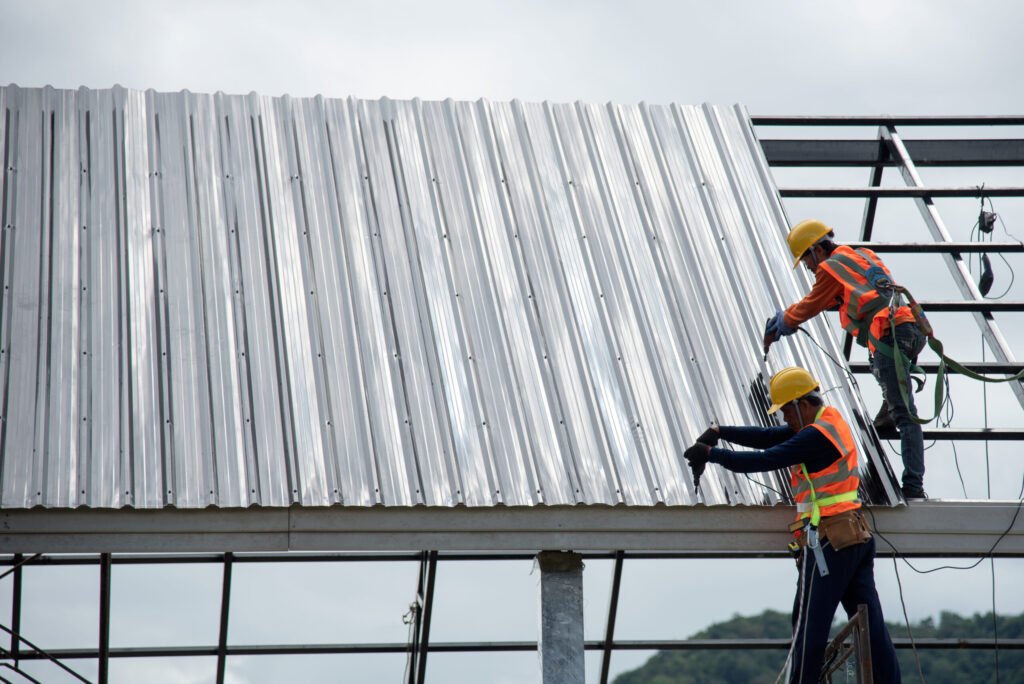
Metal Roofing
If you’re looking for a metal roof, you can opt for steel, zinc, tin, copper, or aluminum. Metal is highly weather-resistant, durable, lightweight, environmentally friendly, energy-efficient, and long-lasting (with a 40-year lifespan). Depending on the exposure of fasteners, metal roofs may be traditional or standing seam metal roofs.
Installation is difficult, and it may take homeowners several days to finish. And there are also some safety and building codes necessary for the installation, which you should keep in mind.
Cedar Shake Roofing
Cedar shake roofing is made of split logs. It withstands harsh weather conditions, looks attractive, and gives your home a warm, natural, and rustic appeal. But its installation is relatively complex, requiring a roofing contractor.
Asphalt Roofing
One of the most popular roofing materials is asphalt. This makes sense when you consider the different shapes, colors, and sizes you can find it in, including tab shingles, architectural shingles, and luxury shingles. This type involves a relatively simple installation process, but it requires some experience.
What Do You Need for Installing a Roof?
There are certain supplies and tools needed for the roof installation process. You can either buy or rent them, but it would be better to hire professionals already with the required equipment.
Tools
- Extension Ladder: Look at the weight rating of your ladder. It should be able to support your weight with an added 80 lbs.
- Fall Protection Equipment: This kit typically contains a roof harness, rope, and hook.
- Safety Gears: Safety gear may include work gloves, a hard hat, eye protection, and rubber-soled shoes or boots.
- Tool Belt: Use the belt to store your tools and get free use of your hands.
- Air Compressor: A compressor helps nail shingles to the decking.
- Air Hose: This hose can deliver air to an object.
- Circular Saw: The circular saw can cut additional vent holes in the decking.
- Chalk Line: Such lines help professional roofers lay their shingles in straight rows.
- Caulk Gun: Its setting will allow you to get the nails secured into the shingles.
- Utility Knife: You can trim extra underlayment or shingles with a utility knife’s hook blade.
- Stapler: Roofers may use staplers to attach shingles to the roof sheeting.
- Straightedge: You can use a straightedge to draw a straight line or check if you’ve laid your shingles in a straight line with it.
- Scaffolding: Use scaffolding to install the drill edge and the first several courses.
Materials
You’ll determine the needed materials when you discuss them with your contractor. There are numerous options, and the choice of your roofing material type will rely on the budget, climate, aesthetic, home structure, and more.
The roofer may supply the materials for a cost, or you can get them yourself. These materials may be tiles, roof cladding with insulation properties and gutter systems.
Pre-Installation Guidelines
To prepare for the installation process, here are some tips:
Avoid Property Damage
Take measures to prevent any damage to your home. Move any surrounding objects, such as vehicles and yard furniture, away. And cover landscaping using a tarp, and position garbage cans so that any debris falls from the roof directly into them.
Take Safety Measures
Roofing is hazardous, so fulfilling safety requirements is necessary if you’ll DIY the project. To illustrate, you must:
- Put on protective gear.
- Use fall protection equipment and a roof harness.
- Wear rubber-soled shoes or boots for maximum grip.
- Fix the tool belt to your waist.
- Ensure that no people or pets are close by to prevent any sliding materials from injuring them.
- Wait till the roof is dry (so that it isn’t slippery).
- Use crawling boards to work on the roof sheet if possible. If not, walk on and close to the purlin supports to keep your body weight evenly distributed.
- Follow the instructions on the label of any roofing materials to protect yourself against dangerous chemicals.
- Keep the roof edges in mind as you work.
- Watch out for exposed and fallen nails on the roof.
Estimate the Number of Shingles You Need
Whether you’re installing the shingles yourself or working with a contractor, calculating the approximate number of needed shingles is crucial to budgeting. In turn, this estimate enables you to determine how much underlayment you need.
In this process, you start by multiplying the length by the width for each area and adding the product to get the total area. Then, divide the total surface area by 100 to get the number of areas of 100 feet, which is called squares.
After, multiply the number by three because you’ll need about three bundles or units of standard shingles for every square. Finally, add 10% to 15% extra shingles, as there’s bound to be some waste and trimmings.
Get a Free Estimate
Contact a professional roofing service, and schedule an inspection with them. They’ll look at your property to determine the challenges of this project and the appropriate tools and materials. They’ll discuss the suitable roofing material for your home with you.
And they’ll give you a free estimate, at which point you can officially hire them. The quote includes the cost of their time, materials, and necessary tools. They also provide the time of installation, specific roofing requests you’ve made, and a plan for the installation process.
The Roof Installation Process
Before you embark on this roof installation project, you should understand how it unfolds with the following steps:
Step 1: Remove Old Roofing
If you already have roofing, workers will remove it before installing another. They possess the expertise to remove the old roofing membrane without damage to other layers and sheathing, especially around vents, chimneys, skylights, and siding. This way, you won’t deal with any unnecessary and costly repairs.
And they can also work with you to find the best way to remove the roof without much disruption to your life. The removal process depends on the type of roofing you have, which makes it a tailored service.
For instance, a contractor may use a full-sized pry bar or drill on a metal roof to pry it loose. But if it’s an asphalt-shingled roof, they might pry the shingles off with a shingle fork. Also, they take care of any remaining dirt or debris from the removal process and dispose of your old roofing.
Step 2: Inspect the Roof Deck
Your contractor assesses the sheathing (flat panels that give your roofing materials a base and structural support). Are there any weak points, moist areas, or damaged spots to repair? Are there any old nails that they should remove or pound flat so that they don’t tear into your new shingles?
Your roofers prepare your deck to fit the requirements of your roof shingles. This way, the deck roof will be smooth, tightly fastened to the roof trusses, dry, clear of holes and gaps, and ready for the new roofing material.
Step 3: Remove Flashing
Contractors inspect the flashing, which is made of galvanized steel or aluminum for joints (such as the drip edge and roof valleys, vents, and chimneys). If it needs replacing, they add and seal it to prevent water penetration.
Step 4: Install the Drip Edge
A contractor puts a new metal drip edge along the eaves or along the bottom of your home. Then, they nail it in place against the roof. They install it before the underlayment in the lower part of the roof and after the underlayment for its sides.
Drip edges aren’t typically required, but they give roofs a finished look, prevent shingles from curling over the edge, and prevent water from running down your fascia boards.
Step 5: Install the Underlayment
Underlayment or roofing felt acts as a moisture barrier, as it sheds water and protects the framing and sheathing against getting damp and rotting.
If your roof doesn’t have one, the roofer lays an ice and water barrier or leak barrier to protect particularly vulnerable areas from ice dams and windblown rain.
Then, they unroll the underlayment at the edge of the roof over the leak barrier and drip edge. It should cover sidewalls, rakes, hips, and ridges. They lay it under the drip edge for extra protection before fastening the drip edge back into place. It should run over the top of the ridge, covering the top edge of both rows of underlayment on both sides.
They use an overlapping and nailing technique in their installation and fix the underlayment with cap nails above the drip edge. After installing the underlayment, they run a drip edge over it on the sides to prevent water penetration.
Step 6: Install Starter Shingles
Starter shingles are half as wide as regular shingles. Roofers align them with the drip edge on the rakes and eaves. Without them, water will run between the first row’s seams and onto the underlayment, which may cause leakage. Also, your roof will have less wind resistance, and your first shingles course won’t have a sealant adhesion point or a straight edge.
For shingled roofs, workers begin by laying starter shingles at the bottom and sides of your roof. Professional roofers may install starter shingles on the gable ends for a cleaner look (although it isn’t mandatory). Then, they establish the correct joint stagger via successive courses of shingles.
As for metal roofs, roofers screw up the vertical edge (into the ridges’ roofs and not the flats). Then, they do the same for the following rows to get a flat roof. This way, they can redirect water away from the fasteners and avoid water pooling.
Step 7: Install the Shingles
If you’re wondering what the process looks like, workers line up the bottom of the first shingle row with the bottom of the starter shingle row.
Roofers determine the reveal (uncovered portion of the shingles by the shingle above it) and install the next row of shingles accordingly (from the bottom up). They overlap them in a way that makes them staggered to offset the joints and breaks from the ones of the previous course.
For overhang, they run shingles long over the roof edge. Then, they trim them off with the hook blade of a utility knife. This way, the shingles will have a nice streamlined look.
Professional roofers are well-acquainted with the roofing materials’ installation and nailing instructions. They tailor the nail positions to your location’s wind speed and roof pitch. This way, you don’t have to worry about improper nailing, have your roof fail during storms, or risk losing the shingles’ limited warranty coverage.
Step 8: Fit Shingles Around Roof Features
The pipe penetrations in your roofing require special treatment. Professionals measure and cut the shingles to fit around the pipe. And they install a pipe collar or boot over it, securing it with nails. They run a bead of roofing cement on the pipe’s collar and under its bottom edge. Then, they install more shingles, cutting them as needed.
As for vents, skylights, chimneys, and other penetrations, roofers install flashing and shingles in a way that directs water away from those holes.
Step 9: Clean Up
One of the signs of a professional roofing service is how clean your home exterior looks after the termination of a project. Roofers typically clean up any remaining dirt and debris on the roof and around the house if it isn’t in a dumpster or garbage can already. Some may use magnetic sweepers to collect the fasteners.
And they can also conduct an inspection to ensure proper roof installation and check that the roofing material isn’t defective and that the final product fulfills all of your specific needs.
How to Choose a Roofing Contractor

With warranties and the life of your roof depending on the quality of its installation, you must choose a top-notch roofing contractor. But how can you do that? The following tips should help:
- Read Online Reviews: Online reviews will help you learn about the experiences of previous clients with a service and assess its experience.
- Look for Licenses: A Better Business Bureau (BBB) accreditation is proof that the company has provided tons of clients with the services they need and guaranteed them satisfactory results.
- Get Free Estimates: Getting free quotes from at least three contractors allows you to compare and determine which one offers you the most value for your money.
- Schedule an Appointment: An in-person appointment will help you settle on the right contractor.
FAQs
Why Should You Install a New Roof?
A new roof protects your home’s interior and occupants. It prevents moisture, water, debris, and branches from slipping into your home, causing mold, mildew, and other forms of damage. Not to mention, it withstands wind, snow, rain, and extreme temperatures.
Does Roof Installation Affect Your Home Value?
Absolutely, you can expect a new roof to increase your home value, although the increase will hardly compensate you for the investment you make.
How Much Does a DIY Roof Installation Cost?
The U.S. Census Bureau’s American Home Survey estimates the average cost of a DIY roof replacement to be $5,036.
Get a Free Quote Now!
By now, you should have a comprehensive idea of roof installation, its required tools and materials, the installation process, preparations, and more.
And if you’re overwhelmed, don’t worry because we’ll be with you every step of the way. Simply contact us now, and a Heritage Exteriors building contractor will be in touch to aid you with any roofing needs!